Who doesn’t love receiving Christmas cards during the holiday season?!?! The problem is always figuring out where to display them…well I found the perfect solution! It’s a DIY project that is easy, simple, and festive and you can use it year after year. I was inspired by this idea on Pinterest.
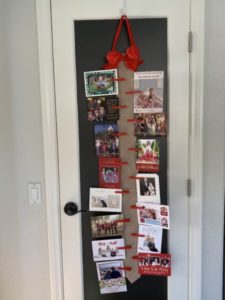
Here’s what I went with:

With the help of Micheals, Amazon, and a hot glue gun…you can get started:
Materials needed:
Micheals or Amazon:
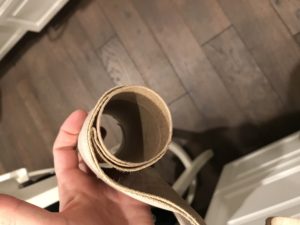
- Burlap: At least 12′ I bought a few rolls and was going to return what I didn’t use but received so many cards that I just made a second one 😉
- Red Ribbon (tip: pick out one that has a wire on the edges, looks best & keeps shape when making a bow)
Amazon:
Other items needed:
- Empty toilet paper roll
- Hot glue gun
Directions:
Step 1: Measure out the Burlap and fold it in half to have the ends meet evenly. At least 12″, determine how long you want it to be, and then double it.
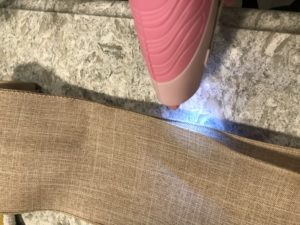
Step 2: Take the folded over end and wrap it around the toilet paper roll. Make a line of hot glue on the burlap side and glue it to the toilet paper roll. Then, put the glue in a line on the outside of the folded over burlap to glue it to the burlap part that will hang down long. Look at the picture below for the visual.

Step 3: You now will need to glue together the sides all the way down to the bottom. Make short lines of glue along the edge and then push together the ends to match them up. Refer to the next two pictures for visual direction. Don’t get too far ahead of yourself with the glue…take your time. Slow and steady is the way to go with keeping the glue hot and to ensure that the ends match up straight.
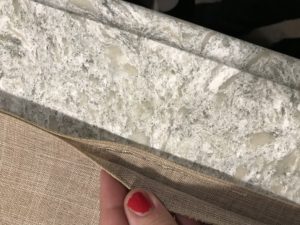
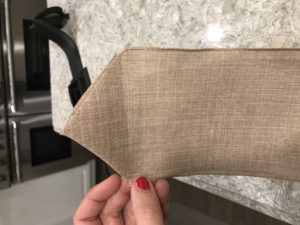
Step 4: You want the bottom of the banner to come to a pretty point. Take the top layer of the burlap and fold down one corner to create a pointed tip and glue it in place. Then glue the top layer to the bottom layer. See images below.

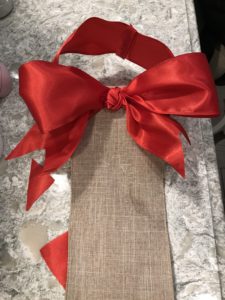
Step 5: Next up is making the ring that you will use to hang the banner onto the door hook. You want to figure out how big you want it. Then you want to fold over the ends to have it look clean. Glue the ends together and slide the glued ribbon part to not show and to stay inside the toilet paper roll unseen.

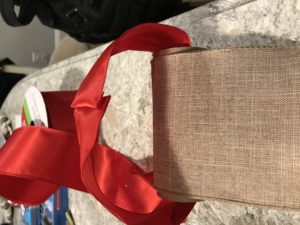
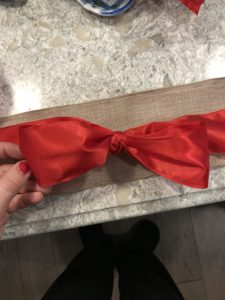
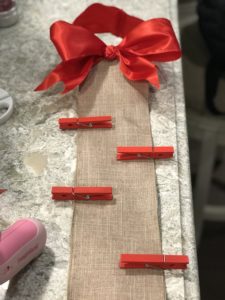
Step 6: Next up is making the pretty bow. Don’t cut the ribbon first, you want to be able to play with it to get it to the desired size you want. First, make the knot and leave the ribbon on both ends and tie your bow to the size you want it. I would keep the ends on the shorter side so they won’t interfere with the display of the cards. Instead of cutting the ribbon straight across, I think it gives the bow more style to cut out a triangle shape on the ends. Then put glue on the knot on the backside of the bow and glue it to the center of the roll. When you use the wired ribbon you can get the bow to look full and keep a good shape.
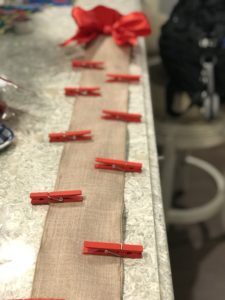
Step 7: The final step is gluing on the red clothespins. You want to make sure the clip side that will hold the card is facing outward. Put glue on the backside of the pin and hold it down on burlap for a few seconds. Once you have put on the first pin put the next one on the opposite side. Move down the burlap around 2.5-3″ and then glue on the next clothespin.
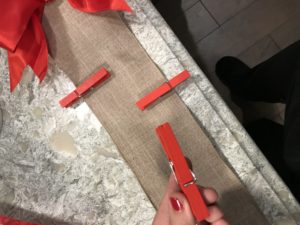
Keep gluing them down until you get to the bottom right before the burlap starts to make a point….try to fit as many as you can on one cardholder.
After you wait for everything to dry…this doesn’t take too long. Start putting Christmas cards into clips. You want to arrange them so each card doesn’t cover up another card. Then hang this door hook over the desired door and hang up your new festive Christmas cardholder.
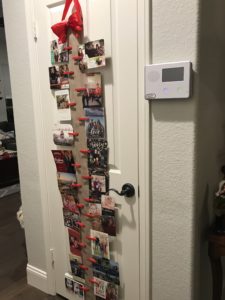
Now you can enjoy and admire all the people you love throughout December! I may even have kept mine up through January when all the other decorations were taken down because I loved it so much, lol!
Happy Crafting, Friends!
XO